
Deploying an Angular Application to an AWS S3 Bucket
In this blog, we will learn about how to deploy a web application built with angular onto an AWS S3 bucket.


AWS S3 is an object storage service that offers industry-leading scalability, data availability, security, and performance. It is mostly used to store data like images, videos, files, etc but it can also be used to serve static web applications so let's dive right into it.
Create Application
First, let's install Angular CLI by running the following command.
npm install -g @angular/cli
Make sure you have nodejs installed before running the command
Create a new application.
ng new angular-aws-tutorial
Change directory into your newly created app.
cd angular-aws-tutorial
Start the application.
ng serve
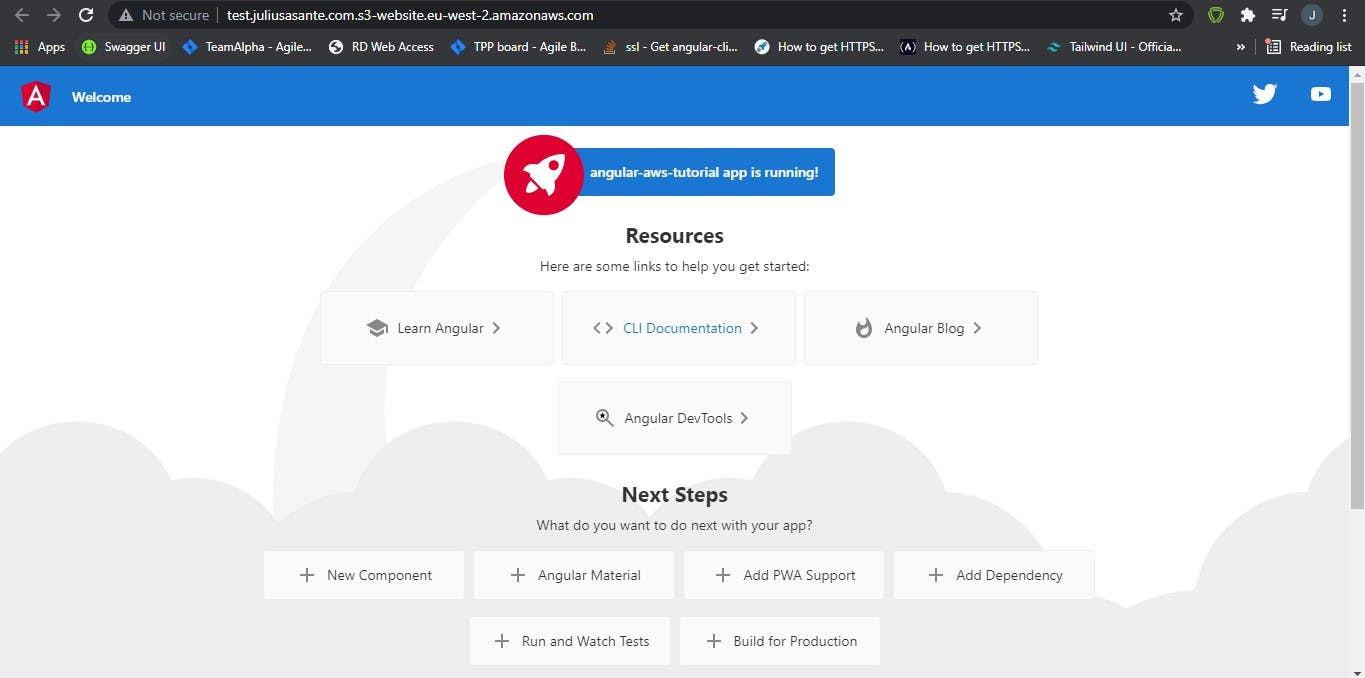
After successful compile, you should see a screen like this when you open localhost:4200 in your browser.

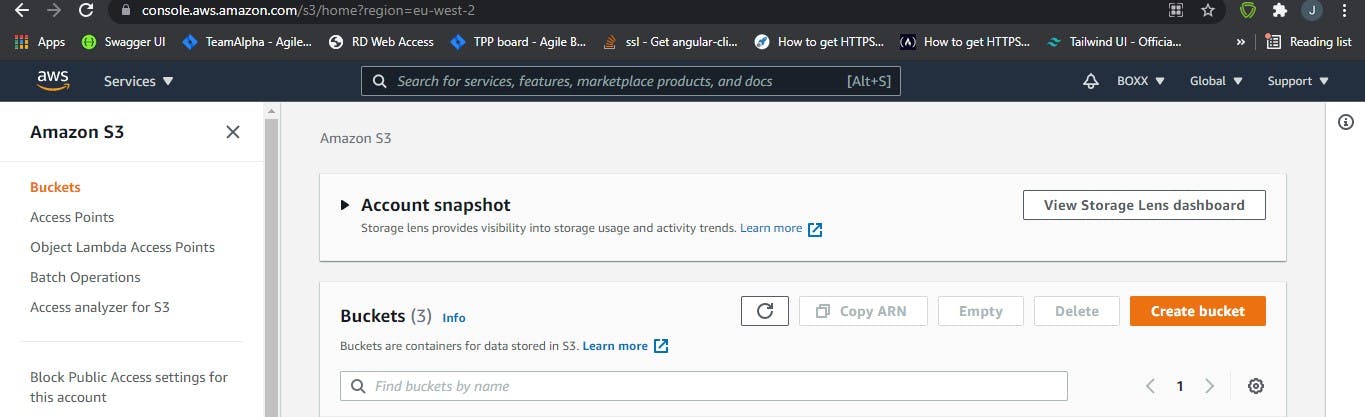
Create an S3 Bucket
For the next steps make sure you have an AWS account. If you don't, you can sign up here. After successfully signing up, log in to your S3 console. Follow these steps to create a bucket:
- Click on "Create Bucket"
Enter bucket name. For demonstration sake, I will enter
www.test.juliusasante.com.Select AWS Region, select the region closest to you to reduce cost and time for serving content. Take note of this as we will be using the region later in deploying the app.
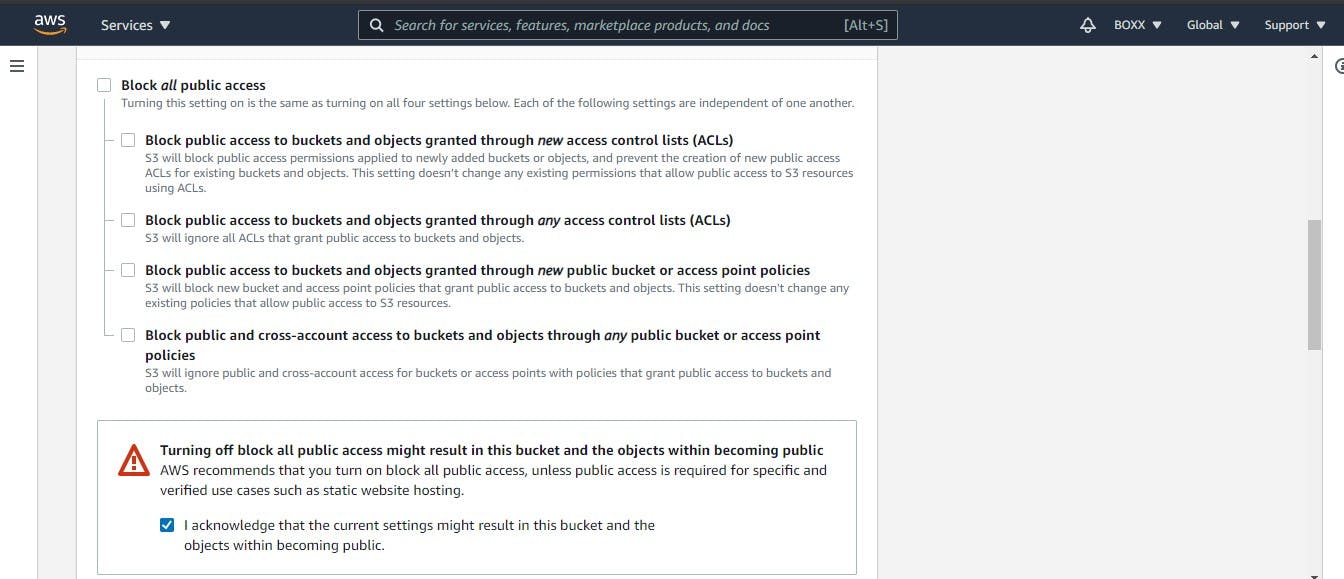
Uncheck "Block all public access". This will ensure our app is accessible to anyone on the internet.
Enable Bucket Versioning
Leave the rest as it is and click on "Create bucket"
All is good now we have our bucket created, let's start by configuring a few stuff.
Click on the name of the bucket we just created
Click on the Properties tab
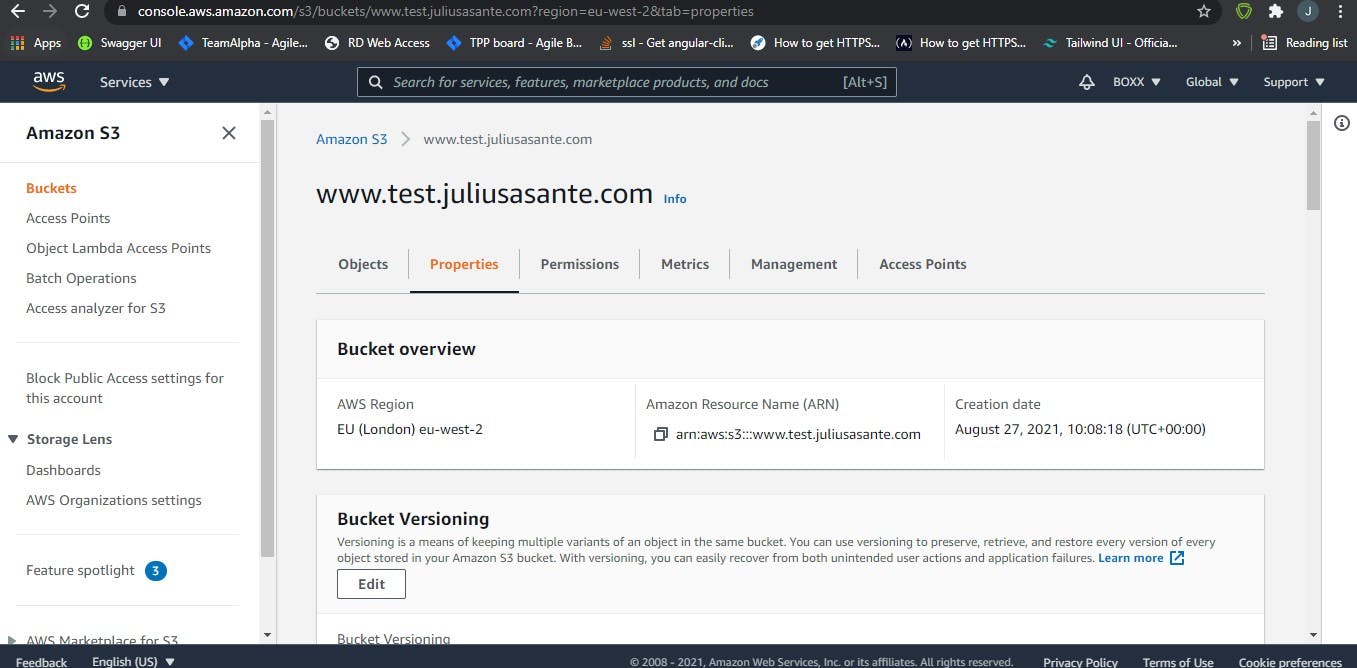
Scroll down to the bottom to the "Static website hosting" section and click on "Edit".
Select enable. When you do, other options will now show.
At the "Index document" enter index.html
At the "Error document" enter index.html
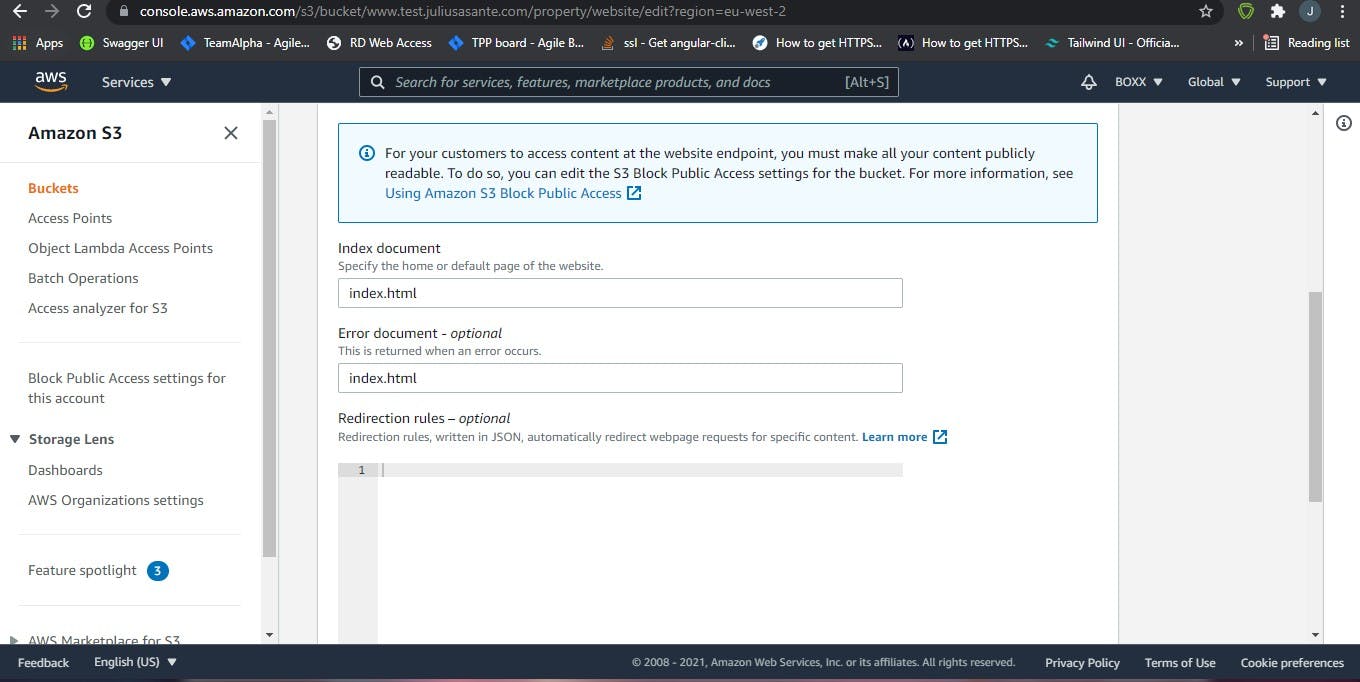
Click "Save Changes"
Next, click on the Permissions tab and scroll to the "Bucket policy" section
Click Edit and add this code in the Policy section
{
  "Id": "Policy1630064093868",
  "Version": "2012-10-17",
  "Statement": [
    {
      "Sid": "Stmt1630064058717",
      "Action": [
        "s3:GetObject"
      ],
      "Effect": "Allow",
      "Resource": "arn:aws:s3:::www.test.juliusasante.com/*",
      "Principal": "*"
    }
  ]
}
If your bucket ARN is different, that is if you have a different bucket name, change the Resource to your Bucket arn and don't forget to append /* to the end

Click "Save changes"
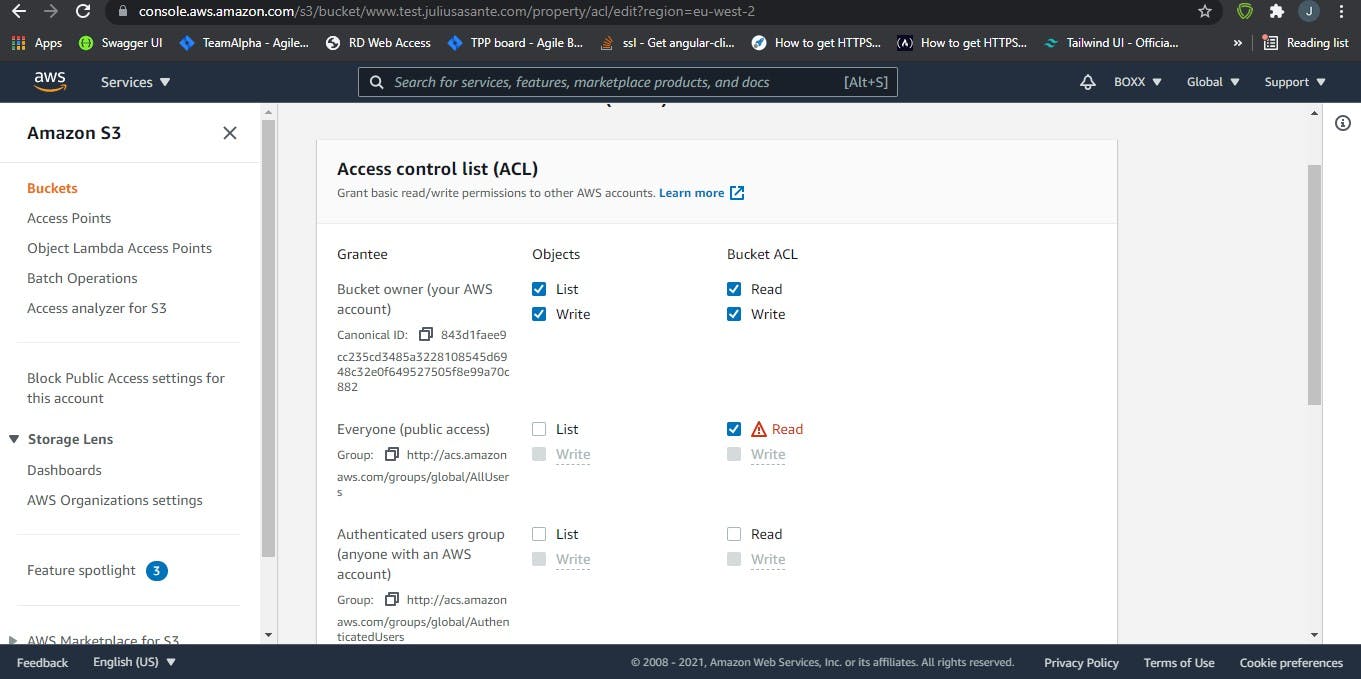
On the same Permissions tab scroll down to "Access control list" and click "Edit"
For "Everyone (public access)", select "Read".
Don't forget to select "I understand the effects of these changes on my objects and buckets." and click "Save changes".
Deploy App
Now our bucket is ready to host our app so now let's deploy the Angular app we created. First, we will need an AWS access key and access key ID so let's create one.
Head over to your AWS IAM console
On the navigation menu, choose Users.
Choose your IAM user name (not the check box).
Open the "Security credentials" tab, and then choose "Create access key".
To see the new access key, choose "Show". Your credentials resemble the following:
Access key ID: AKIAIOSFODNN7EXAMPLE
Secret access key: wJalrXUtnFEMI/K7MDENG/bPxRfiCYEXAMPLEKEY
To download the key pair, choose "Download.csv" file. Store the .csv file with keys in a secure location.
With our access key created open the application in your favorite code editor. I'm using VS code.
We are going to use ngx-aws-deploy so open the terminal and enter the following command.
ng add @jefiozie/ngx-aws-deploy
If asked "The package @jefiozie/ngx-aws-deploy@4.0.0 will be installed and executed. Would you like to proceed?" Enter yes
This will update angular.json with a new builder
"deploy": {
    "builder": "@jefiozie/ngx-aws-deploy:deploy",
    "options": {}
}
Next, enter this command
npx cross-env NG_DEPLOY_AWS_ACCESS_KEY_ID=1234 NG_DEPLOY_AWS_SECRET_ACCESS_KEY=321ACCESS NG_DEPLOY_AWS_BUCKET=mys3bucket NG_DEPLOY_AWS_REGION=eu-1-region ng deploy
NG_DEPLOY_AWS_ACCESS_KEY_ID is the access key id we generated.
NG_DEPLOY_AWS_SECRET_ACCESS_KEY is the access key we generated.
NG_DEPLOY_AWS_BUCKET is the name of your bucket (www.test.juliusasante.com if you used the same as mine).
NG_DEPLOY_AWS_REGION is the region you selected when creating the bucket.
This command will build and upload our application to our S3 bucket.
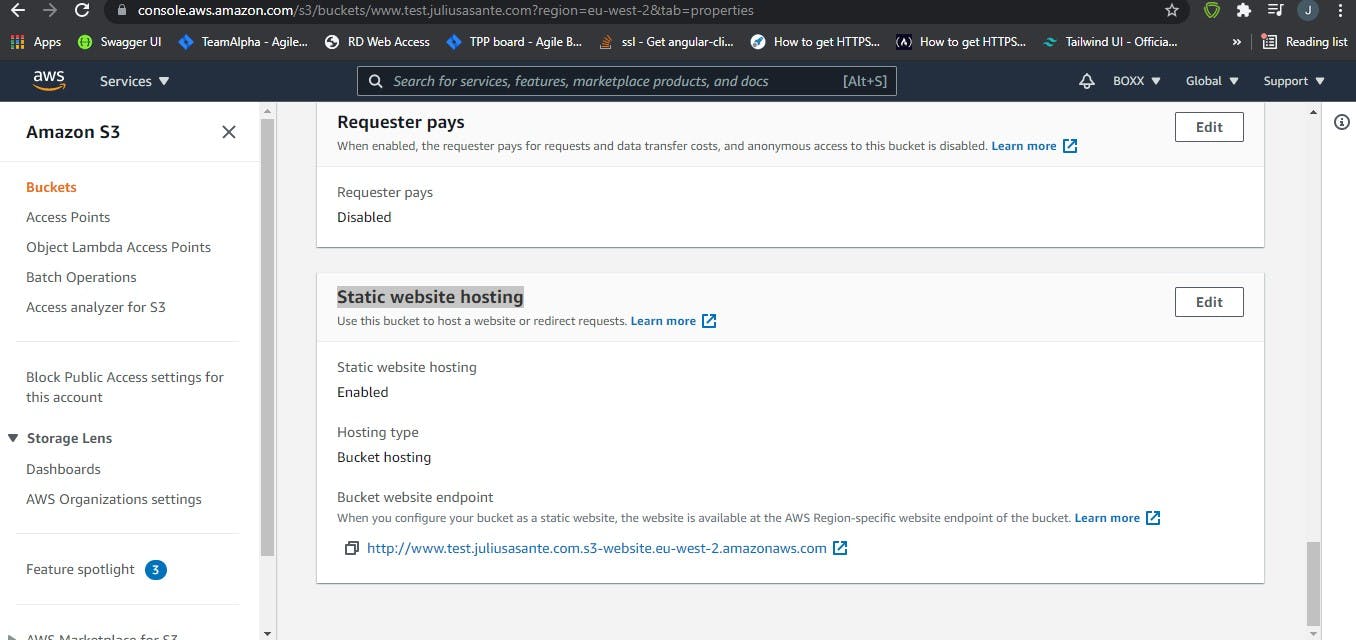
All Done folks! So now if we go to our bucket > Properties tab and scroll down to the "Static website hosting" section we can see a link we can use to view our web application.
So in this tutorial, we were able to build and deploy a simple angular application onto AWS S3 bucket. You can follow me on twitter for more content on angular.
Header photo by Sixteen Miles Out on Unsplash